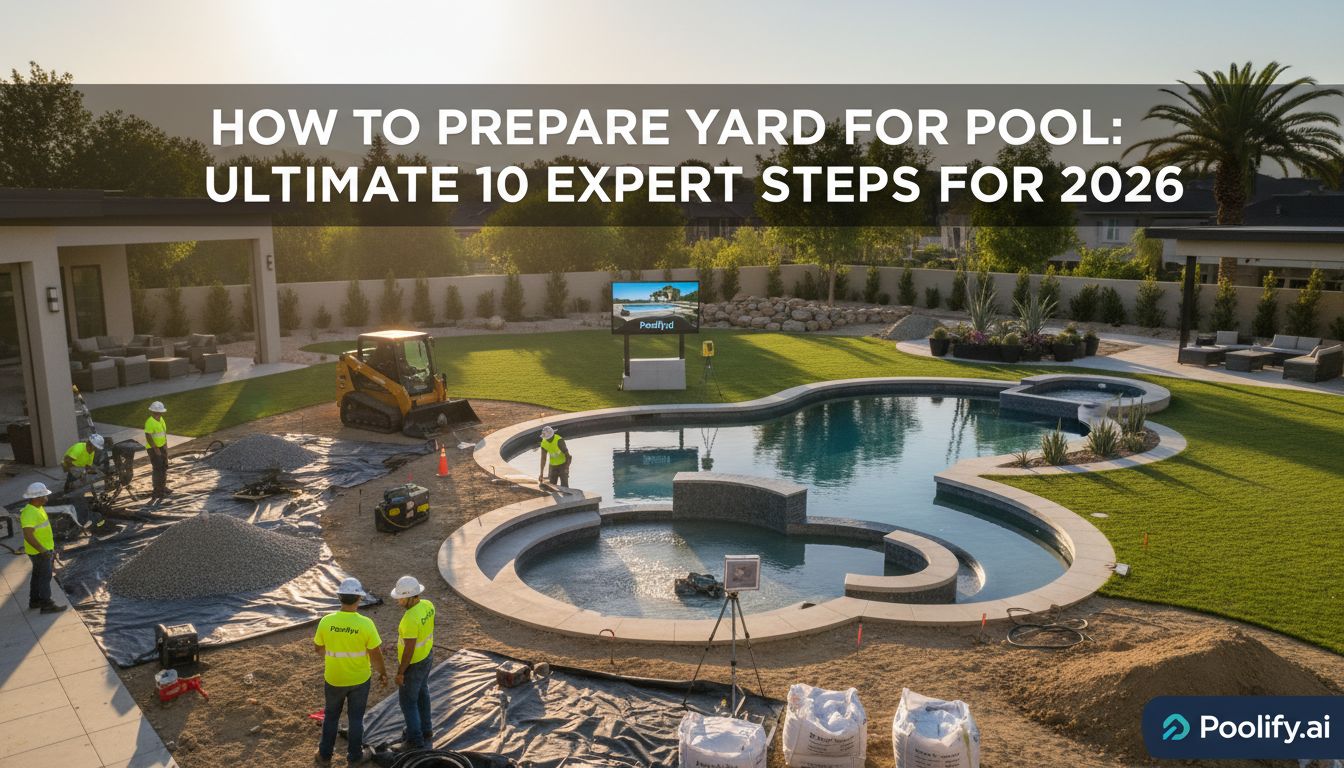
Introduction: Creating the Perfect Foundation for Your Dream Pool
Learning how to prepare yard for pool installation is the critical first step toward creating your backyard oasis. Whether you’re planning an inground pool, above-ground installation, or natural swimming pond, proper yard preparation ensures structural integrity, longevity, and safety for years to come. In 2026, homeowners are increasingly focused on sustainable preparation methods and smart planning that minimizes environmental impact while maximizing enjoyment.
The process of preparing your yard for a pool involves much more than simply digging a hole. From soil analysis and drainage considerations to utility location and permit acquisition, each step plays a vital role in your project’s success. This comprehensive guide walks you through the ten essential steps to prepare your yard properly, helping you avoid costly mistakes and ensuring your pool installation proceeds smoothly from start to finish.
Step 1: Conduct a Comprehensive Site Assessment
Before breaking ground, understanding how to prepare yard for pool installation begins with a thorough site assessment. This critical evaluation determines whether your chosen location can safely accommodate a pool and identifies potential challenges before they become expensive problems.
Start by examining your yard’s topography and slope. Ideally, pool sites should have minimal slope, though modern engineering can accommodate moderate grades. Walk your property during and after rainfall to observe natural water flow patterns and identify low-lying areas where water accumulates. These observations reveal drainage issues that must be addressed before pool installation.
Evaluate sun exposure throughout the day, as optimal placement maximizes natural heating and extends your swimming season. Consider prevailing wind patterns that affect water temperature and debris accumulation. Trees provide beautiful shade but drop leaves, seeds, and branches into pools, increasing maintenance requirements. According to the U.S. Department of Energy, proper site selection can reduce pool heating costs by up to 50% through strategic sun exposure.
Assess soil composition by digging test holes at various depths. Clay-heavy soil retains water and may require enhanced drainage systems, while sandy soil drains quickly but offers less structural stability. Rocky terrain increases excavation costs significantly. Document these findings to share with pool contractors during the bidding process.
Professional Site Evaluation Benefits
While DIY assessment provides valuable insights, professional evaluation identifies issues invisible to untrained eyes. Geotechnical engineers analyze soil bearing capacity, groundwater levels, and potential settlement risks. Their reports guide foundation design and prevent catastrophic failures after installation. Investment in professional assessment typically costs between $500 and $1,500 but can save thousands in remediation expenses.
Step 2: Locate and Mark Underground Utilities
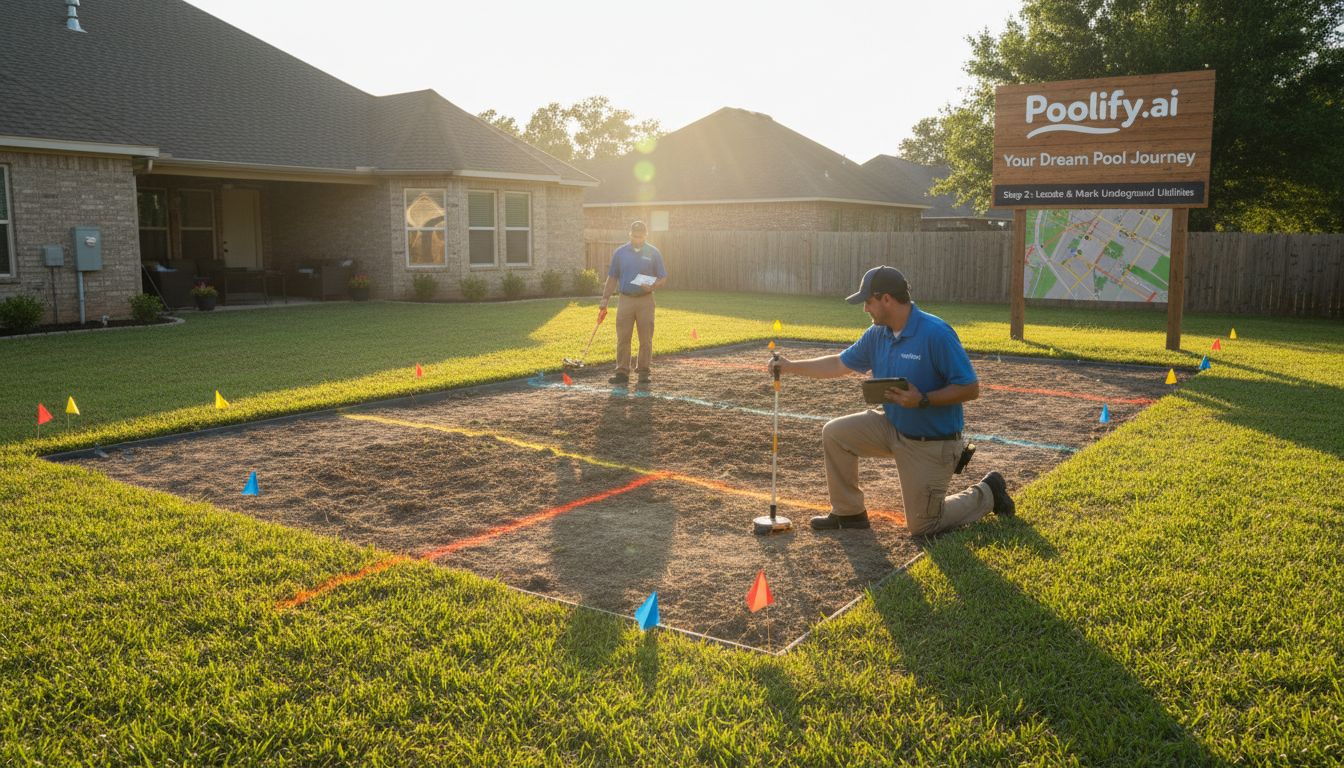
Understanding how to prepare yard for pool installation requires absolute certainty about underground utility locations. Striking water lines, gas pipes, electrical conduits, or fiber optic cables during excavation creates dangerous situations and expensive repairs while delaying your project significantly.
Contact your local utility location service—in most states, dialing 811 connects you to a free utility marking service. Schedule this call at least three business days before planned excavation. Utility companies send technicians to mark water, gas, electric, cable, and telephone lines with color-coded flags or spray paint. This service is free and legally required in most jurisdictions.
However, 811 services typically mark only utilities up to your property line or meter. Private lines running from your home to outbuildings, sprinkler systems, low-voltage landscape lighting, and septic systems remain your responsibility to locate. Review property surveys and building permits to identify these private installations. Consider hiring a private utility locating service for comprehensive mapping, especially on larger properties with complex systems.
Photograph and document all marked utilities before excavation begins. Create a simple site map showing utility locations relative to permanent landmarks like property corners or structures. This documentation proves invaluable if markings fade during extended projects or if questions arise during construction.
Step 3: Obtain Necessary Permits and Approvals
Navigating the permitting process is an essential aspect of how to prepare yard for pool installation in 2026. Permit requirements vary significantly by municipality, but virtually all jurisdictions require approval before installing inground pools. Skipping this step results in fines, mandatory removal orders, or complications when selling your property.
Visit your local building department to understand specific requirements for your area. Typical permits include building permits for the pool structure, electrical permits for pumps and lighting, and plumbing permits for water and drainage systems. Some municipalities require separate permits for decking, fencing, and accessory structures like pool houses or cabanas.
Homeowners associations (HOAs) often impose additional restrictions beyond municipal codes. Review your HOA covenants carefully and submit required applications well in advance. HOAs may regulate pool size, placement, fencing style, and even water features. Approval processes can take 30 to 90 days, so plan accordingly to avoid construction delays.
Setback requirements dictate minimum distances between pools and property lines, septic systems, wells, and structures. Most jurisdictions require pools to sit at least 10 feet from property boundaries and 15 feet from septic systems, though requirements vary. Verify these distances during site planning to ensure compliance. For more information on pool installation requirements, explore our comprehensive pool installation guide.
Permit Application Timeline
Submit permit applications 4 to 8 weeks before your planned construction start date. Include detailed site plans showing pool dimensions, placement, equipment locations, and utility connections. Most jurisdictions require engineered drawings for inground pools, which your pool contractor typically provides. Budget $200 to $1,000 for permit fees depending on pool size and local rates.
Step 4: Plan Drainage and Water Management Systems
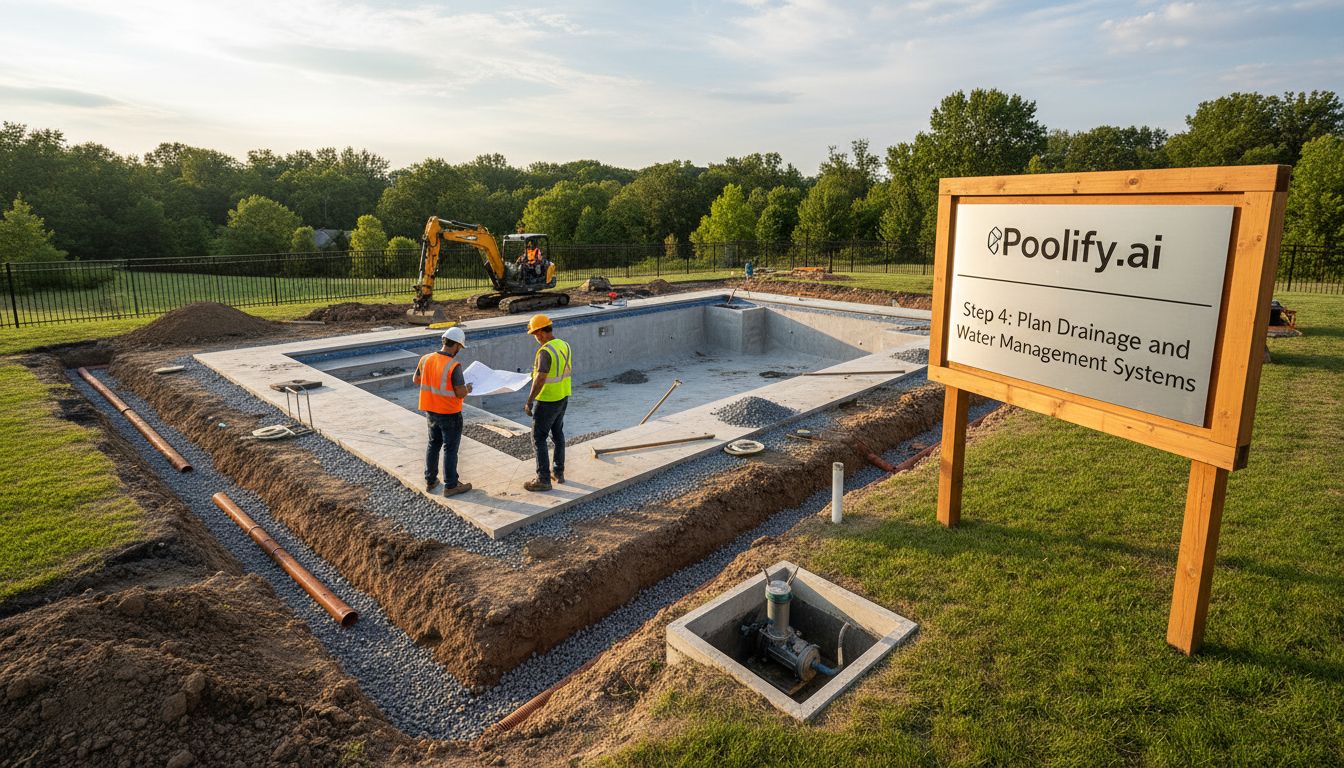
Effective drainage planning is crucial when learning how to prepare yard for pool installation. Poor drainage causes structural damage, flooding, and premature deterioration of pool surfaces and surrounding hardscapes. In 2026, sustainable drainage solutions that manage stormwater responsibly have become standard practice.
Analyze how water currently flows across your property during heavy rainfall. Pools should never sit in natural drainage pathways where runoff concentrates. Water flowing toward pool excavations during construction creates muddy conditions and unstable soil. After installation, improper drainage causes deck flooding, soil erosion, and water intrusion beneath pool structures.
Design drainage systems that direct water away from the pool area. French drains—perforated pipes surrounded by gravel—effectively intercept and redirect subsurface water. Install these drains upslope from the pool to prevent groundwater from undermining the structure. Surface drainage channels or swales guide runoff around rather than through the pool area.
Consider installing a sump pump system if your property has high groundwater levels. These systems collect water that accumulates beneath or around the pool structure and pump it to appropriate drainage areas. While adding upfront costs, sump pumps prevent hydrostatic pressure that can crack pool shells or cause entire structures to lift from the ground during wet seasons.
Plan for pool backwash water disposal according to local regulations. Many municipalities prohibit discharging chlorinated water directly into storm drains. Designated drainage areas, holding tanks, or connections to sanitary sewer systems provide compliant disposal options. Budget for these systems during the planning phase rather than addressing them as afterthoughts.
Step 5: Clear and Remove Vegetation
Vegetation removal is a significant component of how to prepare yard for pool installation. This process involves more than simply cutting down trees—it requires complete removal of roots, stumps, and organic material that could decompose beneath your pool and cause settling.
Begin by identifying which trees and shrubs must be removed based on your pool’s footprint and surrounding deck area. Add a 5 to 10-foot buffer zone around the planned pool perimeter to accommodate construction equipment access and provide working space for crews. Mark trees for removal with bright ribbon or spray paint to prevent accidental removal of specimens you wish to preserve.
Professional tree removal services handle large specimens safely and efficiently. Attempting to remove large trees without proper equipment and expertise creates safety hazards and potential property damage. Costs vary based on tree size, location, and disposal requirements, typically ranging from $300 to $2,000 per large tree. Many services include stump grinding, which removes stumps 6 to 12 inches below grade.
Complete stump removal is essential within the pool footprint and deck areas. Even ground stumps leave root systems that decompose over time, creating voids and settlement. Excavate stumps entirely within the construction zone, removing major roots extending from the stump. Chemical stump removers accelerate decomposition but require months to work—inadequate for pool installation timelines.
Vegetation Disposal Options
Explore sustainable disposal options for removed vegetation. Chipping services convert branches and small trees into mulch for landscaping. Some municipalities offer free yard waste disposal at designated facilities. Larger logs may have value as firewood. Planning disposal in advance prevents unsightly brush piles from lingering on your property throughout construction.
Step 6: Test and Prepare Soil Conditions
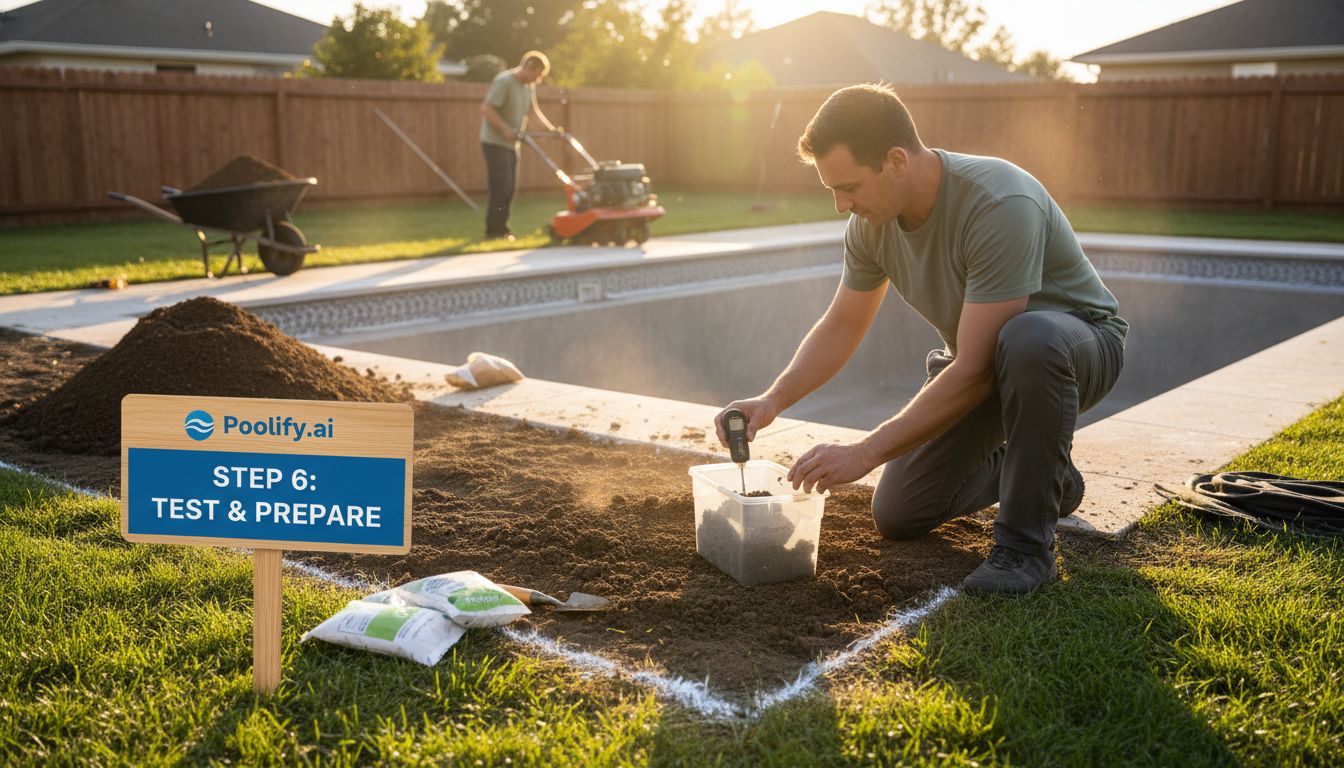
Understanding soil conditions is fundamental to how to prepare yard for pool installation successfully. Soil composition affects excavation difficulty, structural stability, and long-term performance. Professional soil testing identifies potential problems before they compromise your investment.
Hire a geotechnical engineer to conduct soil borings at your proposed pool location. These tests analyze soil composition, bearing capacity, moisture content, and the presence of unsuitable materials like organic matter or expansive clays. Engineers typically drill test holes 10 to 20 feet deep, collecting samples at various depths for laboratory analysis.
Soil reports provide specific recommendations for foundation preparation, including required compaction levels, fill material specifications, and potential need for structural reinforcement. Expansive clay soils that swell when wet and shrink when dry require special engineering to prevent pool movement. Organic-rich soils compress under load and must be excavated and replaced with engineered fill.
High groundwater levels revealed during soil testing necessitate dewatering systems during construction and potentially permanent drainage solutions. The water table’s depth relative to your pool’s bottom determines whether hydrostatic relief valves or more extensive drainage systems are required to prevent structural damage.
Soil pH testing helps predict potential corrosion issues for metal pool components and equipment. Highly acidic or alkaline soils accelerate corrosion of steel reinforcement, metal fittings, and underground plumbing. Soil amendments or protective coatings address these concerns before installation. Learn more about maintaining optimal conditions in our pool water chemistry guide.
Step 7: Establish Proper Grading and Elevation
Correct grading is essential when determining how to prepare yard for pool installation. Proper elevation and slope ensure effective drainage, prevent water intrusion, and create stable foundations for both the pool structure and surrounding hardscapes.
The pool site should be graded to slope gently away from the pool in all directions, typically at a minimum 2% grade (2 feet of drop per 100 feet of distance). This slope prevents rainwater and irrigation runoff from flowing into the pool, reducing chemical dilution and debris accumulation. Surrounding deck areas require similar grading to prevent standing water and ice formation.
Use laser levels or transit equipment to establish accurate grade elevations across the site. Mark desired elevations with stakes and string lines that guide excavation and fill operations. Professional pool contractors typically include grading in their services, but understanding the process helps you verify work quality and communicate effectively with crews.
Cut and fill operations balance excavated soil with areas requiring additional material. Ideally, soil removed during pool excavation provides fill for low areas, minimizing material disposal costs and import expenses. However, excavated soil often contains unsuitable material requiring disposal and replacement with engineered fill that compacts properly and provides stable support.
Compaction of fill areas is critical for long-term stability. Loose fill settles over time, causing deck cracking, plumbing failures, and structural stress. Fill should be placed in 6 to 8-inch lifts and compacted to at least 95% of maximum density using mechanical compactors. Testing agencies verify compaction levels through field density tests, ensuring specifications are met.
Grading for Pool Equipment
Plan grading to accommodate pool equipment pads for pumps, filters, and heaters. Equipment requires level, stable foundations with adequate drainage. Position equipment below water level when possible to maintain prime on pumps and reduce energy consumption. Ensure equipment areas remain accessible for maintenance while meeting noise ordinances and aesthetic considerations.
Step 8: Install Temporary Erosion Control Measures
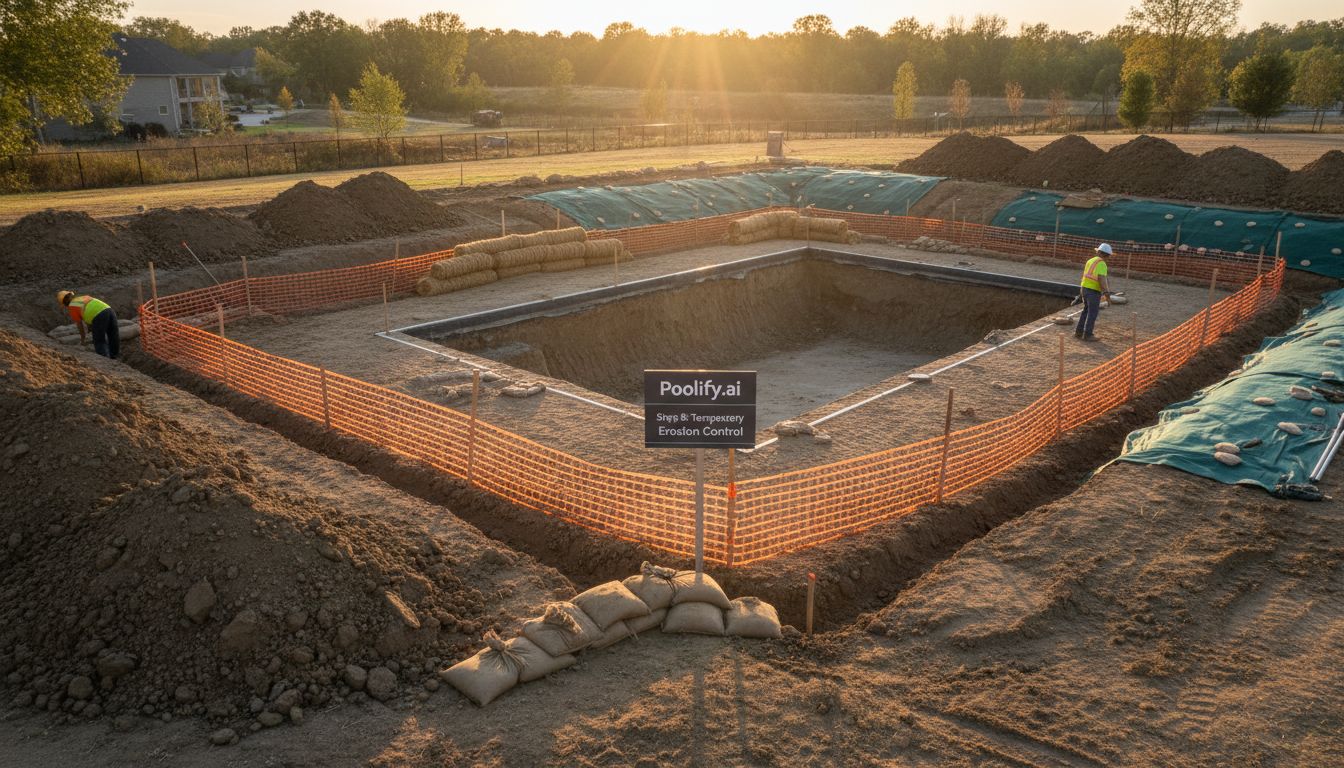
Implementing erosion control is an often-overlooked aspect of how to prepare yard for pool installation, but it protects your property and neighboring areas from sediment runoff during construction. In 2026, environmental regulations increasingly require erosion control plans for residential construction projects.
Exposed soil from excavation and grading operations erodes quickly during rainfall, sending sediment into storm drains, waterways, and neighboring properties. Silt fences—temporary barriers made from geotextile fabric—intercept sediment-laden runoff before it leaves your property. Install these fences along downslope property boundaries before earth-moving begins.
Inlet protection devices prevent sediment from entering storm drain systems. These filters wrap around drain grates or create barriers around inlet structures. Many municipalities require inlet protection for any construction project disturbing more than one acre or located near sensitive waterways.
Stabilize exposed soil that will remain undisturbed for more than 14 days. Temporary seeding, erosion control blankets, or mulch layers prevent wind and water erosion. Stockpiled soil requires covering with tarps or temporary seeding to prevent erosion. These measures seem minor but prevent significant environmental damage and potential fines from regulatory agencies.
Schedule construction activities to minimize the duration of soil exposure. Complete grading and immediately proceed to pool installation rather than leaving excavated areas exposed for weeks. If weather delays are anticipated, implement additional stabilization measures to protect exposed areas.
Step 9: Prepare Access Routes for Heavy Equipment
Planning equipment access is a practical consideration when learning how to prepare yard for pool installation. Pool construction requires heavy machinery including excavators, concrete trucks, cranes, and delivery vehicles. Inadequate access planning damages landscaping, hardscapes, and underground utilities while potentially preventing project completion.
Identify the route construction equipment will follow from the street to your pool site. This path must accommodate vehicles weighing 30,000 to 80,000 pounds and equipment with widths exceeding 10 feet. Measure gate openings, overhead clearances, and turning radii along the proposed route to verify equipment can physically reach the work area.
Protect driveways, walkways, and landscaping along access routes. Heavy equipment cracks concrete, compacts soil, and damages irrigation systems. Lay plywood sheets or steel plates over vulnerable areas to distribute weight and prevent damage. While adding costs, protection measures are significantly less expensive than repairing crushed driveways or replacing compacted lawns.
Underground utilities along access routes require special attention. Mark utility locations clearly and instruct equipment operators to avoid these areas. Consider temporary utility protection such as bridging over shallow lines or rerouting traffic around critical infrastructure. Coordinate with utility companies if temporary disconnection or relocation is necessary.
Communicate with neighbors whose properties might be affected by construction traffic. Large equipment may need to use adjacent driveways for turning or positioning. Proactive communication prevents conflicts and often results in neighbors accommodating temporary inconveniences when they understand the situation and timeline.
Crane Access Considerations
Fiberglass and prefabricated pool shells require crane placement for installation. Cranes need stable, level surfaces and clear overhead space free from power lines and tree branches. Coordinate crane positioning with your contractor weeks in advance, as crane rental represents a significant expense and scheduling must align with shell delivery and installation crews.
Step 10: Create a Detailed Construction Timeline
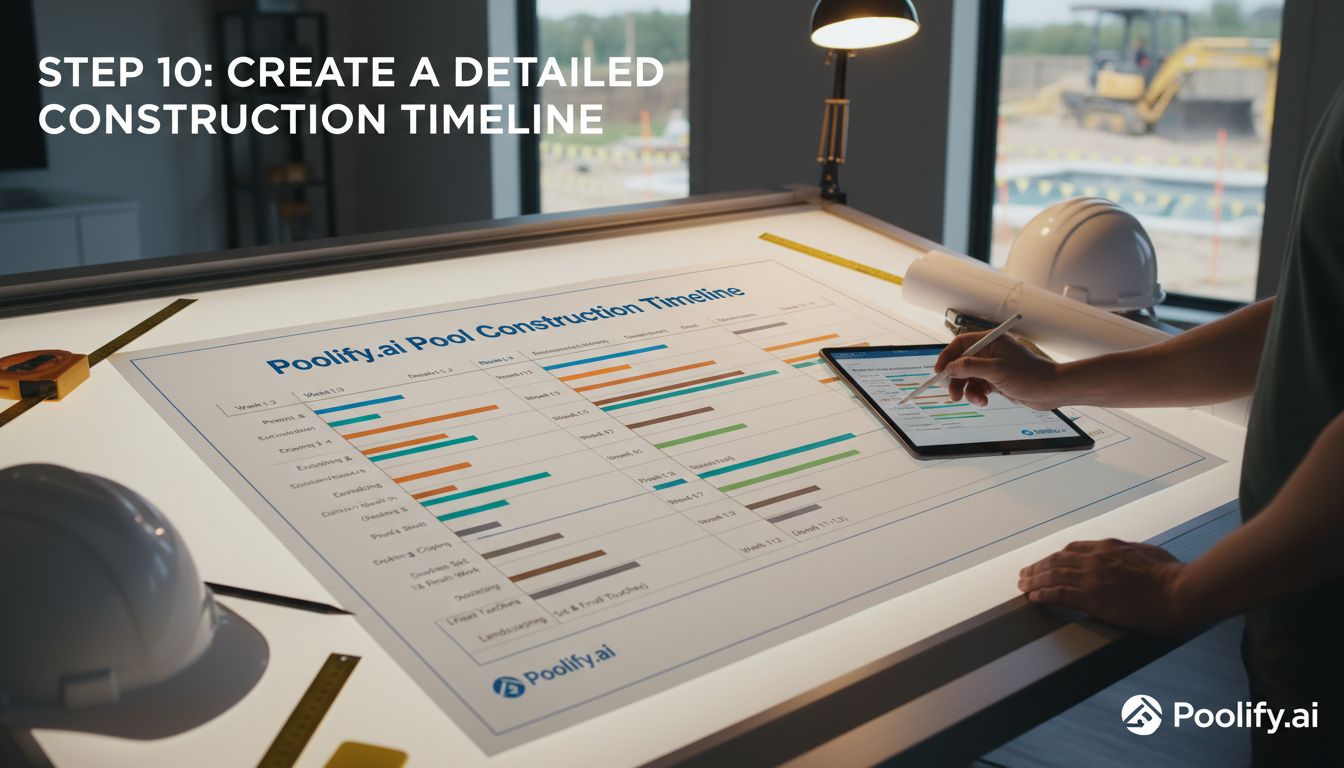
Developing a comprehensive timeline completes the process of how to prepare yard for pool installation. Realistic scheduling coordinates multiple contractors, manages material deliveries, and sets appropriate expectations for project completion. In 2026, supply chain awareness and weather contingency planning are more important than ever.
Work backward from your desired completion date, accounting for each construction phase. Typical inground pool projects require 8 to 12 weeks from excavation to completion, though timelines vary based on pool type, size, complexity, and weather. Custom concrete pools take longer than fiberglass installations. Complex features like vanishing edges, grottos, or integrated spas extend timelines.
Identify critical path activities that must occur in sequence. Excavation precedes steel installation, which precedes plumbing and electrical rough-in, which precedes shell installation or concrete application. Understanding these dependencies helps you recognize when delays in one phase cascade through the entire schedule.
Build weather contingencies into your timeline, particularly for concrete work requiring specific temperature and moisture conditions. Summer thunderstorms, winter freezes, and spring rains all impact construction schedules. Adding 10% to 20% buffer time for weather delays creates realistic expectations and reduces stress when inevitable delays occur.
Coordinate material deliveries with construction phases to avoid site clutter and material damage. Pool shells, equipment, decking materials, and finishing supplies should arrive just before needed rather than weeks in advance. Early deliveries create storage challenges and expose materials to weather and theft.
For additional insights on maintaining your pool after installation, visit our pool maintenance tips resource.
Common Mistakes to Avoid When Preparing Your Yard
Understanding how to prepare yard for pool installation includes learning from others’ mistakes. These common errors cause delays, increase costs, and sometimes result in complete project failures that require expensive corrections.
Inadequate utility location is the most dangerous mistake. Never rely solely on memory or property surveys for utility locations. Always contact 811 and conduct private utility locating for complete coverage. Striking utilities creates safety hazards, service interruptions, and repair costs exceeding thousands of dollars.
Skipping soil testing saves a few hundred dollars upfront but risks catastrophic failures costing tens of thousands to correct. Expansive soils, high groundwater, and poor bearing capacity cause cracking, settling, and structural failures. Professional testing identifies these issues when solutions are affordable rather than after problems emerge.
Insufficient drainage planning causes ongoing problems throughout your pool’s lifetime. Water accumulation around pools damages structures, creates safety hazards, and increases maintenance requirements. Investing in proper drainage during construction is exponentially less expensive than retrofitting solutions after completion.
Ignoring access requirements forces contractors to use smaller equipment, hand-dig areas, or devise creative solutions—all increasing costs significantly. In extreme cases, inadequate access makes projects impossible without removing fences, gates, or even portions of structures. Verify equipment access before signing contracts.
Unrealistic timeline expectations create frustration and poor decision-making. Pool construction cannot be rushed without compromising quality. Pushing contractors to meet unrealistic deadlines results in shortcuts that cause long-term problems. Accept that quality work requires adequate time and plan accordingly.
Frequently Asked Questions
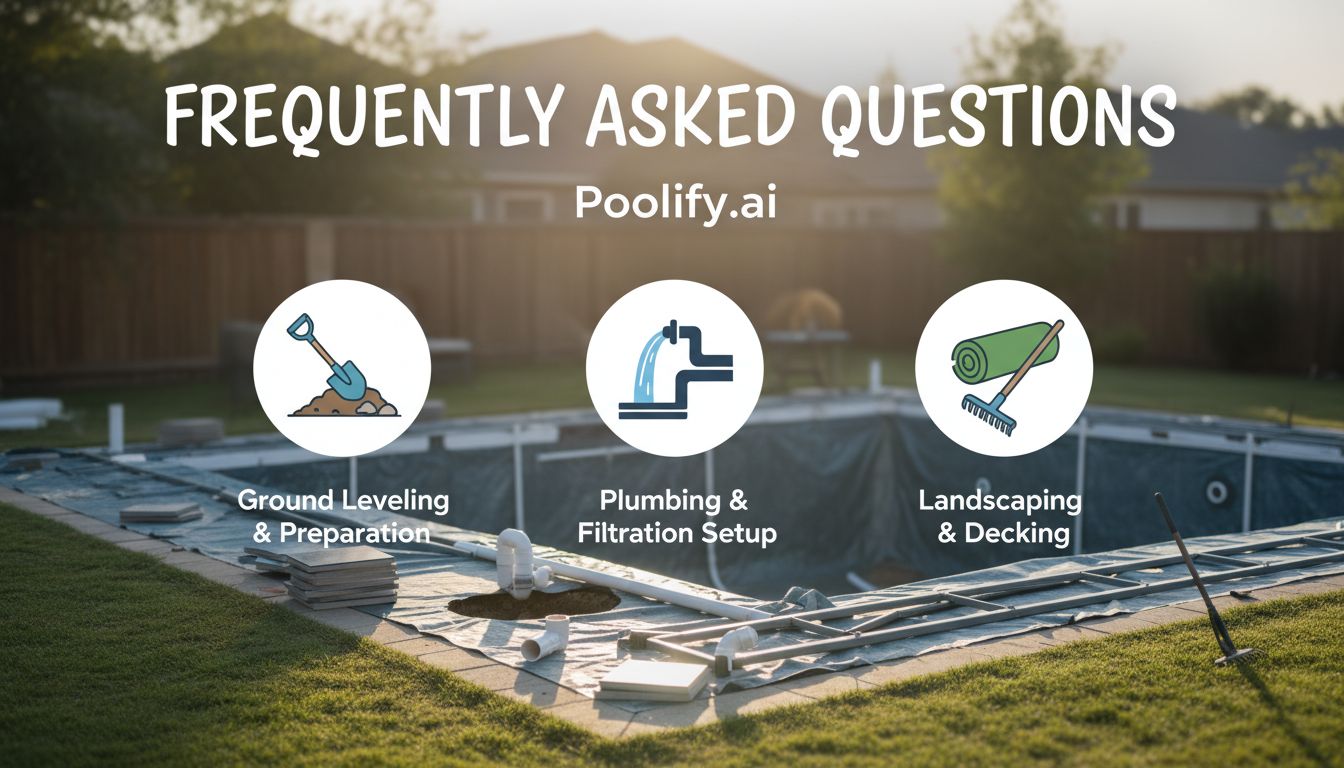
How long does it take to prepare a yard for pool installation?
Yard preparation typically takes 1 to 3 weeks depending on site conditions and required work. Simple sites with minimal vegetation and good drainage may be ready in a few days, while properties requiring extensive grading, utility relocation, or drainage system installation need several weeks. Permit acquisition adds 4 to 8 weeks to the overall timeline before physical work begins.
What is the average cost to prepare a yard for a pool?
Yard preparation costs range from $2,000 to $10,000 for typical residential projects. Simple sites with minimal work cost less, while properties requiring extensive tree removal, major grading, drainage systems, or soil replacement cost significantly more. Soil testing runs $500 to $1,500, permits cost $200 to $1,000, and tree removal averages $300 to $2,000 per large tree. Obtain detailed estimates from multiple contractors for accurate budgeting.
Can I prepare my yard for a pool myself?
Homeowners can handle some preparation tasks like vegetation clearing, utility location coordination, and permit applications. However, grading, excavation, and drainage installation require specialized equipment and expertise. DIY mistakes in these areas cause expensive problems that exceed professional service costs. Most homeowners benefit from professional assistance for technical aspects while handling administrative tasks themselves.
When is the best time of year to prepare a yard for pool installation?
Late winter and early spring offer ideal conditions in most climates. Ground has dried from winter moisture but summer heat hasn’t arrived, creating comfortable working conditions. Starting preparation in early spring allows pool completion by summer. Avoid rainy seasons when soil conditions complicate excavation and grading. In mild climates, fall installation allows enjoying pools the following spring without summer construction rush.
Do I need to remove all trees near the pool area?
Remove trees within the pool footprint and those with root systems extending beneath the structure. Trees immediately adjacent to pools drop debris requiring constant cleaning and roots potentially damaging pool structures and plumbing. However, trees providing afternoon shade 15 to 20 feet from pools offer benefits without significant drawbacks. Consult with arborists to assess root spread and potential conflicts before making removal decisions.
Key Takeaways
- Comprehensive site assessment identifies potential challenges before they become expensive problems, including soil conditions, drainage patterns, and utility locations that affect pool placement and construction methods.
- Proper permitting and approvals are legally required in virtually all jurisdictions and prevent costly compliance issues, fines, or removal orders that jeopardize your investment and property value.
- Professional soil testing and drainage planning ensure long-term structural integrity by identifying soil problems, groundwater issues, and drainage requirements that affect pool stability and performance.
- Adequate equipment access planning prevents construction delays and additional costs while protecting existing landscaping, hardscapes, and underground utilities from damage during the building process.
- Realistic timeline development with weather contingencies sets appropriate expectations and coordinates multiple contractors, material deliveries, and construction phases for smooth project completion.
Conclusion: Building the Foundation for Years of Enjoyment
Mastering how to prepare yard for pool installation sets the foundation for decades of backyard enjoyment. While the preparation process requires significant planning, coordination, and investment, proper execution prevents costly problems and ensures your pool performs beautifully throughout its lifetime. The ten steps outlined in this guide—from comprehensive site assessment through detailed timeline development—provide a roadmap for successful yard preparation.
In 2026, successful pool projects balance traditional construction wisdom with modern sustainability practices and advanced planning tools. Homeowners who invest time in thorough preparation, obtain necessary permits, address drainage proactively, and work with qualified professionals create outdoor spaces that enhance property values and provide endless recreation opportunities.
Remember that yard preparation is not an area to cut corners or rush through. The foundation you create during this phase determines whether your pool remains stable, drains properly, and functions efficiently for 20 to 30 years or experiences premature failures requiring expensive repairs. By following these expert guidelines for how to prepare yard for pool installation, you’re investing in long-term success and creating a backyard oasis your family will treasure for generations.
References
- U.S. Department of Energy – Swimming Pool Heating: https://www.energy.gov/energysaver/swimming-pool-heating